


HP Pavilion Notebook Hard Drive Upgrade
We bought an HP Pavilion notebook from Future Shop about 15 months ago. At the time of purchase, it was the right notebook without costing an arm and a leg. Smallish footprint, bright screen, 250GB hard drive and a decent CPU makes it an attractive package for less than $800. After 15 months’ usage, the notebook hard drive is starting to make some ticking noise. Time to look into finding a replacement hard drive.
For notebook hard drives, we have two main choices: traditional mechanical hard drives or Solid State Drive. The main difference is power consumption, capacity, durability, and price. As in all latest technology, the cost of getting something that is leading edge will usually have the problem of high price over benefits. As good as SSDs are (low power consumption, high durability but low capacity, high price), I don’t think I can justify getting an SSD with 250GB of capacity that will cost more than the notebook computer itself, or go with an SSD with only 32GB of capacity and ask my wife to store all her digital photos offline. So back to investigating traditional mechanical hard drives.
Ran into this review between the Seagate Momentus 5400.6 500GB and the WD Scorpio Blue 500GB hard drives. Both Seagate and WD are respectable manufacturers. I have used both their drives in desktop computers before and I have experienced better than average reliability with desktop drives from these manufacturers compared to the rest.
The Seagate Momentus drive seems to have lower power consumption, lower CPU utilization, but slightly lower transfer speed and slower access time when compared with the WD Scorpio Blue drive. The Seagate drive also has lower vibration and slightly lower acoustic noise.
In terms of price, the Seagate is currently retailing at NCIX for $88.99, the WD is $98.99. So we have a clear winner. The cheaper drive with more benefits wins. Went out quickly and came back after spending almost $100 after the 12% sales tax.
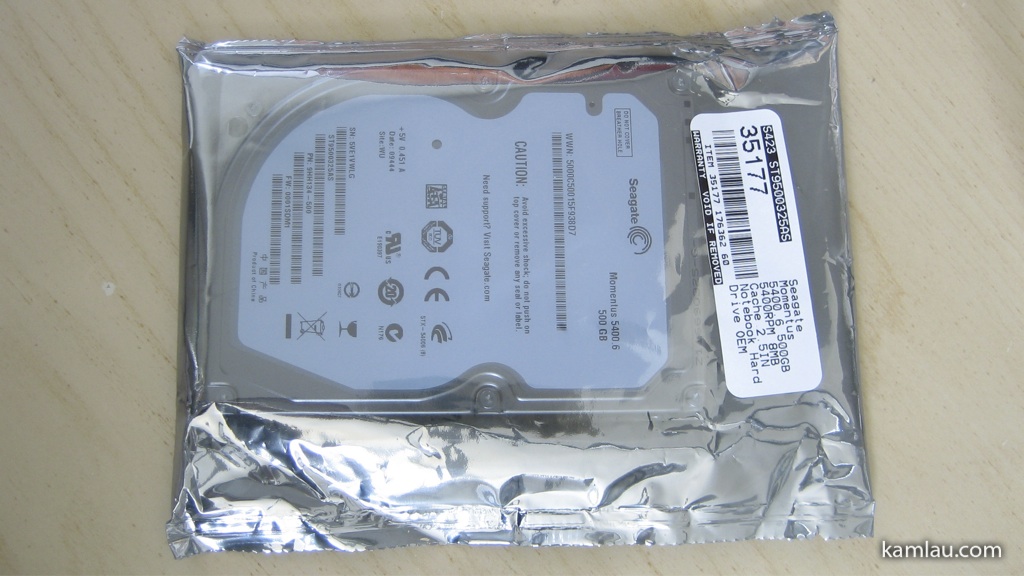
With OEM products, you won’t get any documentation or packaging. It comes with an anti-static bag. There is nothing wrong with less packaging, it is more environmental friendly that way.
Part of the upgrade is to have everything inside the existing hard drive transferred to the new hard drive. There are a few ways to do it.
- Use a hard drive cloning software. But I don’t have a computer that can connect to two 2.5″ hard drive at once. Not an option for me.
- Backing up all documents and reinstall all the programs, then transfer everything back. It seems to be a waste of time….
- Use Windows Home Server and backup, at last, I remember I have a Windows Home Server and this is one of the compelling reasons for having a Windows Home Server. But I have never had to do this before so this is going to be my first full restore operation from the Windows Home Server.
But first thing first, I had to replace the existing hard drive with this new bigger hard drive.

Here is the bottom of the notebook, the hard drive is actually accessible through its own dedicated cover (lower right in the picture).
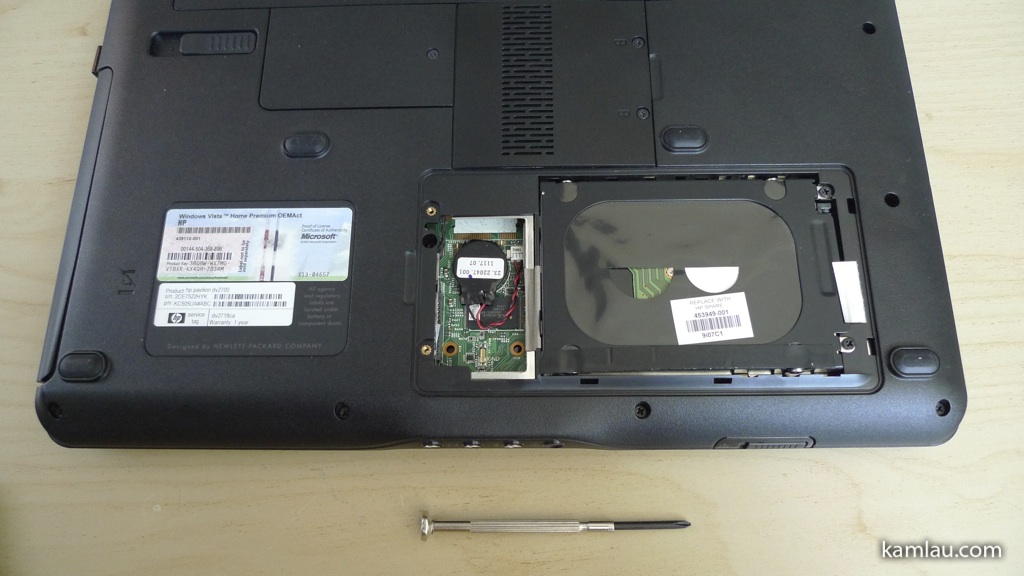
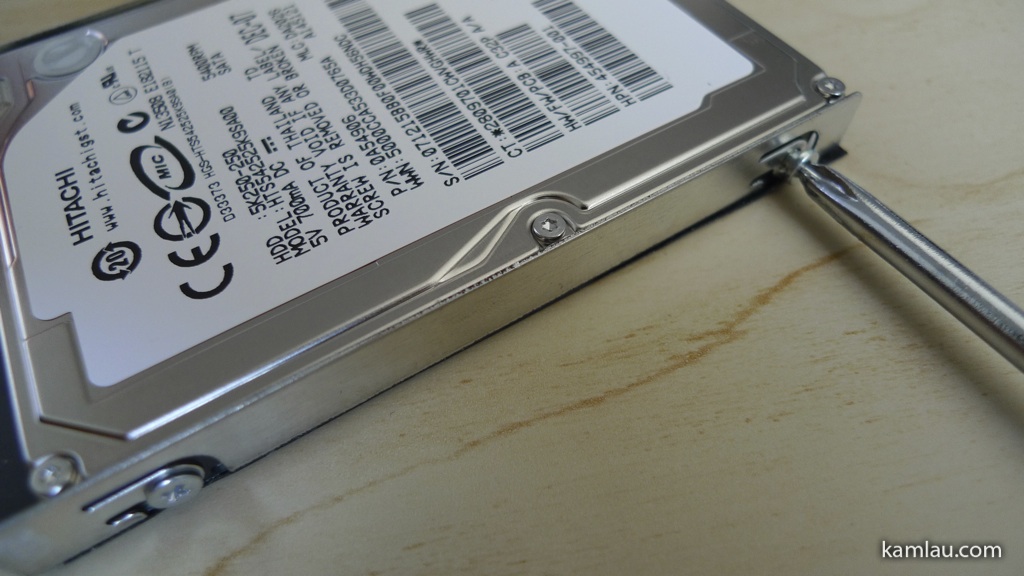
After removing the cover with the small screwdriver, you can see that the drive is below the black bracket. There are a couple screws that secure the bracket to the case.
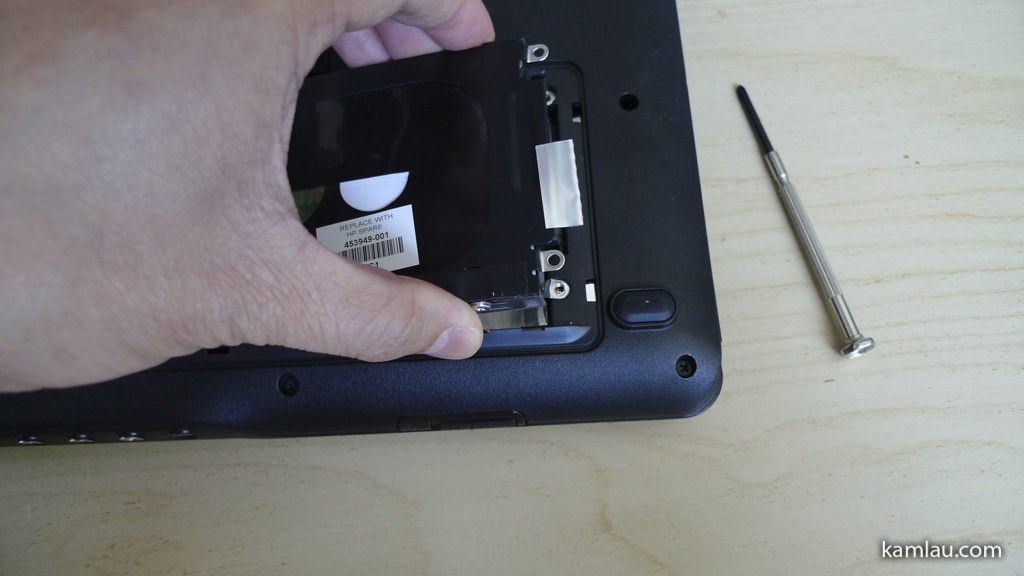
After removing the two screws, it is a matter of lifting it off the case.

There is a custom connector that is installed on top of the SATA connector to make lifting the hard drive off without having to use a lot of effort.
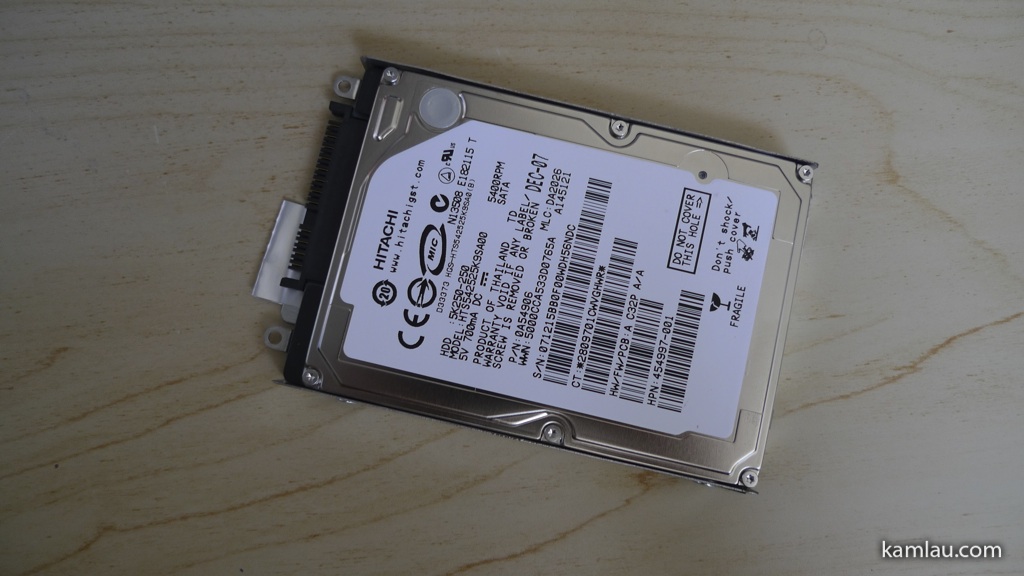
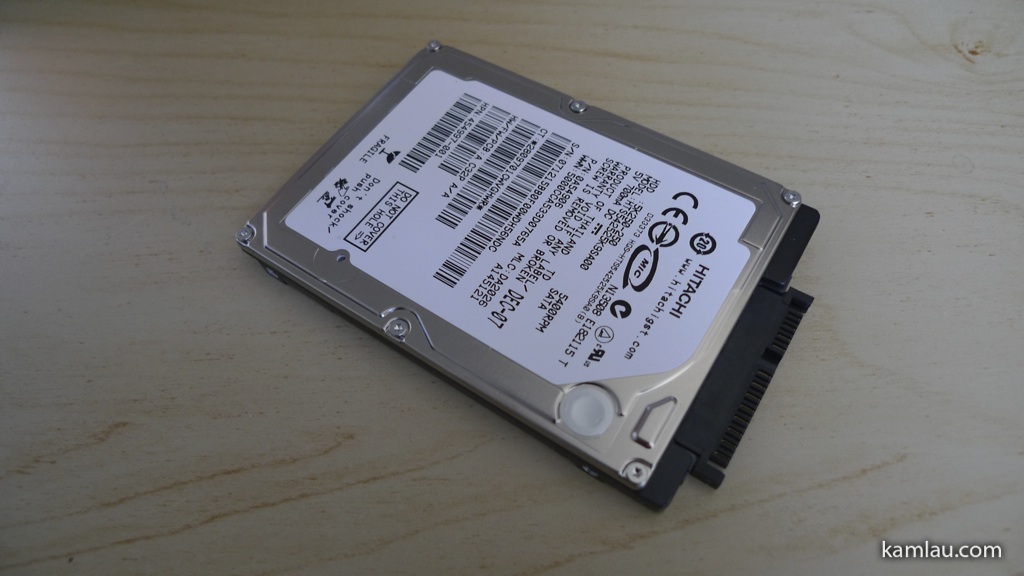
So here it is the Hitachi hard drive still in the bracket and with the custom connector.
The hard drive is held in the bracket by 4 screws.
Now the hard drive is removed from the bracket, it is easier to spot the custom connector.
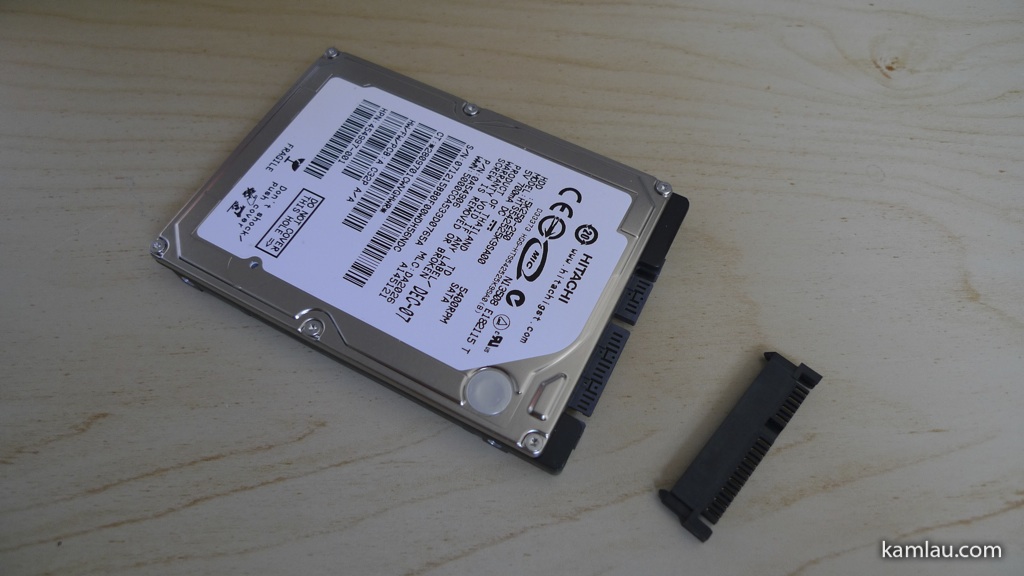
With the custom connector removed from the SATA connector of the hard drive. The custom connector is a pretty good idea. It makes servicing the notebook a lot easier.
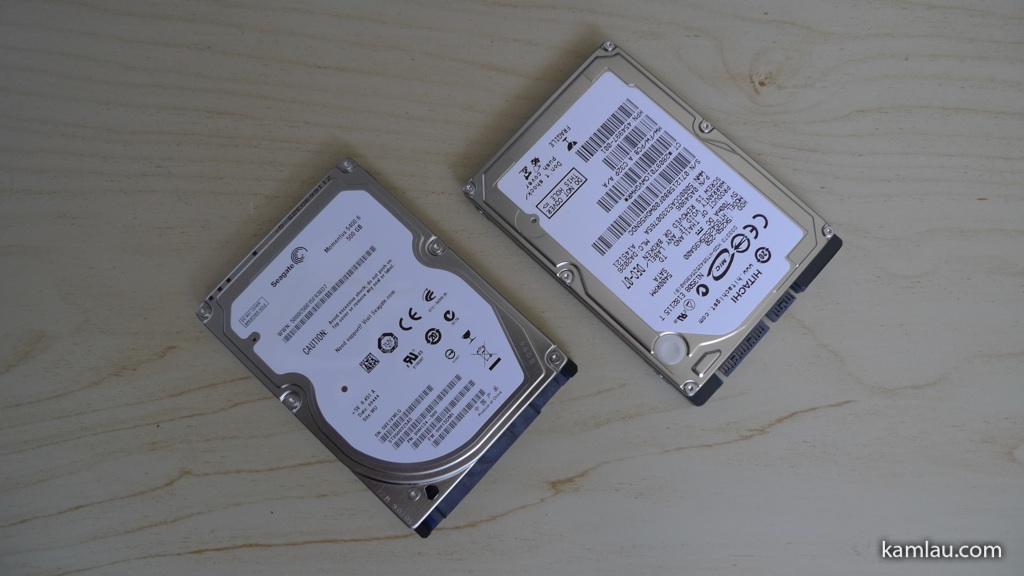
Here are the two hard drives. Considering that they can hold a lot of information for under $100, hard drive technologies have come a long way.
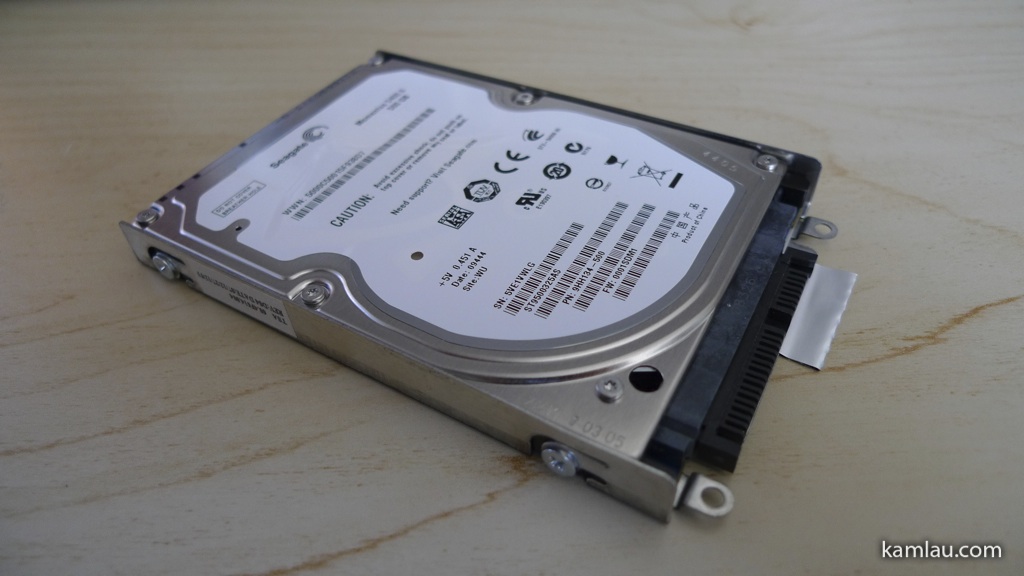
Now the Seagate hard drive is put into the bracket and with the custom connector installed, it is ready to be inserted back into the notebook.

Hitachi hard drive is out, Seagate hard drive is in.
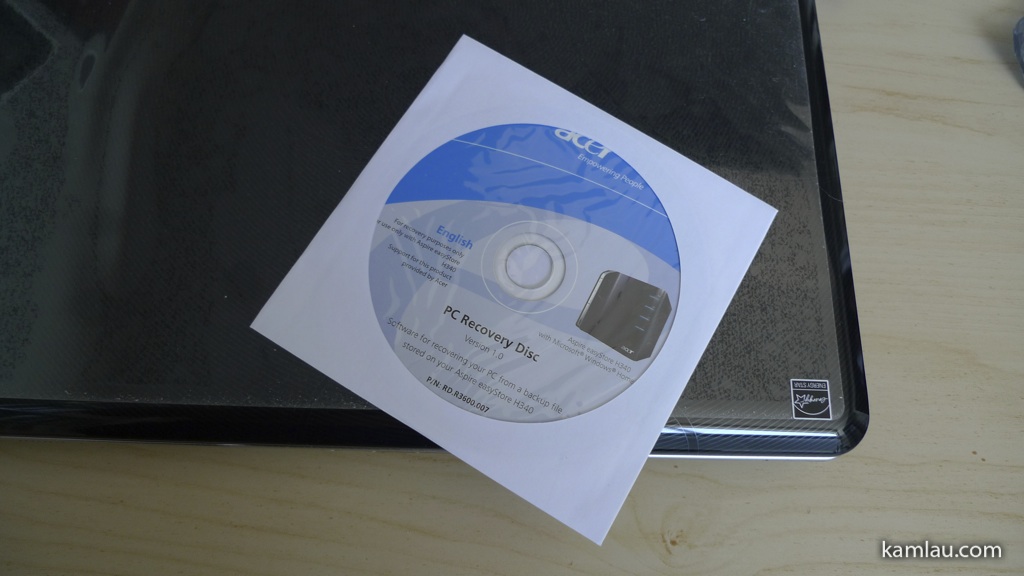
The next step is to attempt to restore the backup to this new blank hard drive using the PC Recovery Disc that came with the Acer easyStore Home Server.
Stay tuned for the next post with the restoring experience using this approach.


don’t you just hate it when harddrives decide it’s their time to go.
It may not be going just yet but it is better safe than sorry with personal and work data. I consider hard drives pretty cheap storage these days.
My preferred HDD is Seagate (although I have no reference for laptop drives). I’ve never had a problem with them yet. Although I admit I won’t buy a new model until it’s been in the market for awhile, so they iron out any problems. I remember when they were noisy has hell (before the GB days), but they never failed on me.
I agree that Seagate desktop drives are louder than Wester Digital drives. I am a big fan of Seagate drives but they did have a batch or two with quality issues. I agree with you that it is better to not get the latest and brand new in the market.
Currently the new HD doesn’t seem as hot as the old one, but today is a cool-ish day compared to the heat wave peaks we recently experienced ^^; Thanks for helping me install it :)
I was considering the seagate. thanks for the review.
You are welcome, good luck with your hard drive upgrade.
I had to replace a failing WD on HP Pavilion dv6653cl Entertainment Notebook PC. Used Acronis to clone from the old WD 250GBto a new Seagate 320GB. I used a Thermaltake BlackX dock to connect the old drive to the laptop via USB.
Clone completed and laptop rebooted successfully. Then I shut it down and booted up again. No boot. Black screen. Pulled battery and pressed power button for 10 seconds. Reinstalled Battery and it booted successfully. Shut it down. Powered up. No boot. Now for it to boot I have to pull the battery and press the power button for 10 seconds. Do you have any suggestions for a solution?
Hi Dave, you problem seems to be hardware related but the first thing I would try is to install Windows on your new replacement drive from scratch and see if that makes a difference. If you don’t have a new copy of Windows, you can even try to install Linux. The idea here is to isolate the problem to see if it is hardware related or if it has something to do with how your hard drive image is cloned to the new drive. If a new OS works on your computer, then it is not a hardware issue. HTH.