How To Setup RAID10 with Ubuntu
Finally I have Ubuntu setup the way I like on the Acer easyStore h340 Windows Home Server hardware. I did not employ any Drive Pooling software as I experienced it on Windows Home Server and I didn’t quite like it. This time, I want my files to be stored in a more standardized, redundant, fault tolerant setup: RAID10. Here is the steps I went through to get my 8 x 1TB drives setup to two separate software RAID10 arrays, creating an effectively ~4TB of redundant storage.
Disclaimer: I am new to Linux and do not know enough about what I am doing. If you follow these steps and resulted in data lost, I am sorry but I can’t be held responsible…. other than that, hope this helps you with what you need to accomplish.
I had Ubuntu 10.04 LTS installed in my Acer easyStore h340 hardware previously. I wanted to maximize the amount of SATA drive bays for my setup: 4 internal to the h340 and 4 in the TowerRAID external SATA enclosure. To preserve this, I ended up installing Ubuntu in an external USB hard drive (200GB). This turns out pretty handy as I was also experimenting with Fedora 13 for a little bit using another external USB hard drive. Anyway, after Ubuntu is setup to my satisfaction, there are a couple of additional software I need to get from the Ubuntu Software Centre:

mdadm is the multi-disk administration tool.

lvm2, Logical Volume Manager, is used to administer logical volumes and volume groups.
Run Ubuntu Software Centre from the Applications menu to search for and download these apps.
The following steps are obtained from Kezhong’s blog and updated and expanded to account for the differences in my hardware. In the example below please ignore the leading “>” as it indicates a command used in the terminal.
Step 1: Prepare the file system on the physical drives

I used the Disk Utility to “Format Drive” (create partition) and then “Format Volume” (create file system) on each of the 1TB drives connected to my system. I used GUID partition table and ext4 file system on each of my drives. After doing this I have a total of 8 drive devices ready for my RAID10 arrays.
Step 2: Create the multi-disk array
Using terminal, I elevated my privilege to super user (root) account for convenience. Otherwise you have to use “sudo” before every command, and Linux will promote you for the password for each command.
In this example, I will use these devices to make up my multi-disk array: /dev/sdg1, /dev/sdh1, /dev/sdi1 and /dev/sdj1. These are the formatted devices from step 1 above. I am also naming my multi-disk device “md2”.
Using this command:

> mdadm -C /dev/md2 -l10 -n4 /dev/sd[g,h,i,j]1
mdadm will manage creating the multi-disk array for you. The above command creates a new multi-disk device called “/dev/md2” with RAID10 (-l10) using 4 devices (-n4) mapped to “/dev/sd[g,h,i,j]1”. This could take a while depending on your hardware. For the easyStore h340 server with the 1TB WD Caviar Green drives attached to the internal SATA connectors, it took about 3 hours for mdadm to finish creating the multi-disk array.
You can check the progress of the creation using the following command:
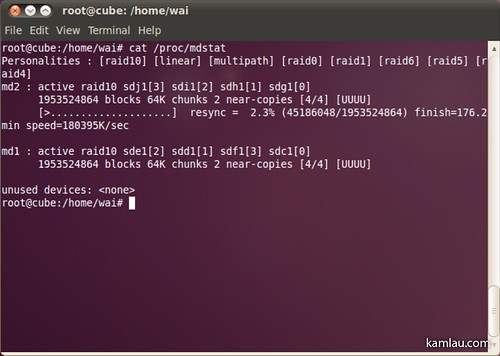
> cat /proc/mdstat
When mdadm finishes, you should see the multi-disk array.
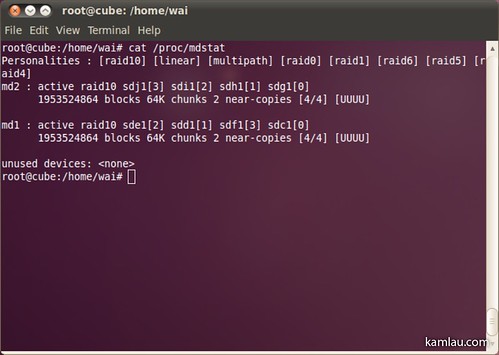
In this example, I have 2 RAID10 arrays created, one for experimentation, one for doing screen capture for this blog post :)
Step 3: Adding the new array to mdadm.conf
Before editing the mdadm.conf file, you need to find out the UUID of the array. The following command displays the detail info of /dev/md2 that includes the UUID info:
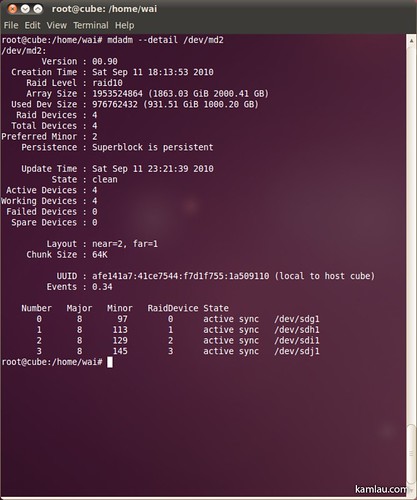
> mdadm --detail /dev/md2
Use gedit to edit the mdadm.conf file. In terminal, run this command to run gedit and load the mdadm.conf file into the editor:
> gedit /etc/mdadm/mdadm.conf

Add the ARRAY registration as illustrated and save the changes.
Step 4: Create a new physical volume
Use this command to create the physical volume for the multi-disk device:

> pvcreate /dev/md2
Step 5: Create a new Volume Group
For my experimental RAID10 array, I used the following command to create the volume group called “RAIDVG”:
> vgcreate RAIDVG /dev/md1
This creates a new volume group called “RAIDVG” and add the “/dev/md1” multi-disk device to the group.
For my second RAID10 array, I had to use a different command as I did not want to create yet another volume group. You can have multiple devices mapped to a volume group. This time I extend the existing volume group with the second multi-disk device.
Using this command:
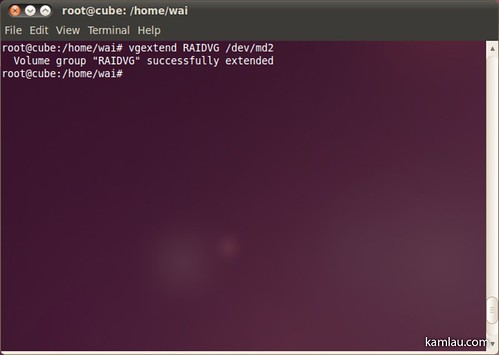
> vgextend RAIDVG /dev/md2
This command adds the “/dev/md2” to an existing volume group “RAIDVG”.
Step 6: Create a new Logical Volume
After adding the multi-disk device to the volume group, I need to map it to a logical volume. Before doing that, I need to know how much space is available to be mapped to a logical volume.
Use this command:
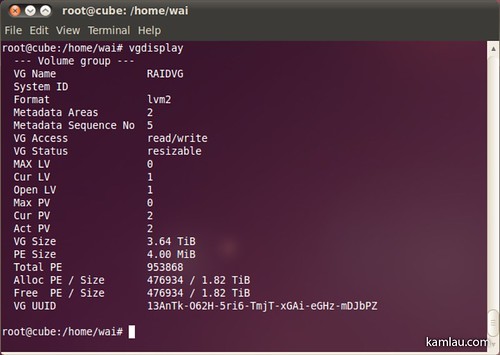
> vgdisplay
And look for the “Free PE / Size” information. The first number is the number of physical extents available (476934 in this example) and the second number is the size available (1.82 TiB). I used the number of free physical extents in the next command to be accurate. The size info is rounded for human interpretation and is not useful for creating a logical volume.
Use this command:
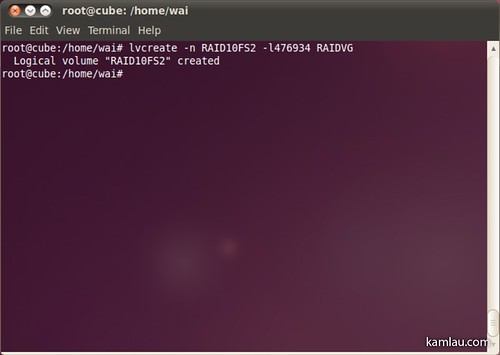
> lvcreate -n RAID10FS2 -l476934 RAIDVG
This command creates a logical volume named “RAID10FS2” using the number of physical extents specified (-l476934) from the “RAIDVG” volume group.
Step 7: Create the File System
After the logical volume is created, create the file system next.
Use the command:
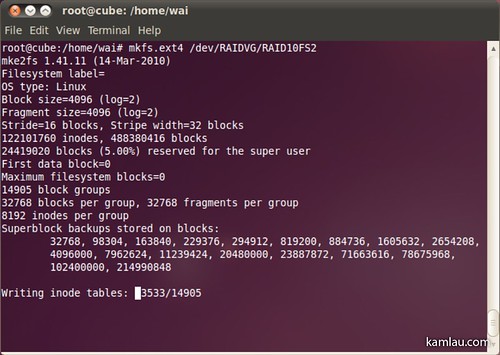
> mkfs.ext4 /dev/RAIDVG/RAID10FS2
This command creates an ext4 file system on the “RAID10FS2” logical volume in the “RAIDVG” volume group. This would take some time as well.
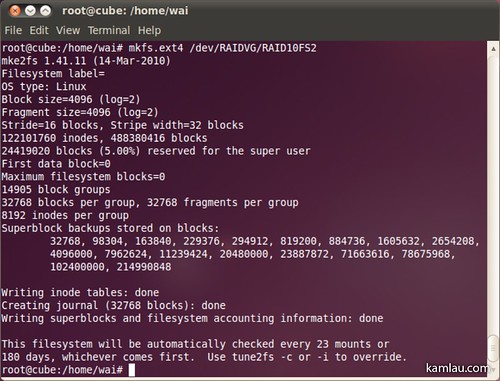
When it finishes, you should see the above.
Next, create a mount point for the newly created file system to mount to:

> mkdir /RAID10-2
I created a folder called “RAID10-2”, then use the following command to mount the file system to it:
> mount /dev/RAIDVG/RAID10FS2 /RAID10-2
Now you can access it using the folder “/RAID10-2”. The RAID device will not appear as a drive device like a CD-ROM drive or an external USB hard drive. At this point, it appears as a folder from the root “/RAID10-2”.
Step 8: Ensure it mounts on boot
It is handy to be able to mount it using a command, but you probably want to have it available after rebooting without having to mount it manually. To do that, we need to know how the file system is mapped.
Use the command:
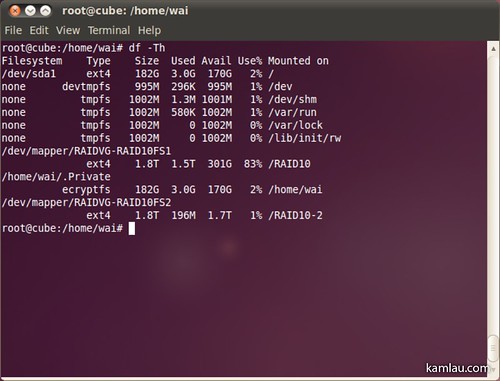
> df -Th
This displays the file system disk space usage, and how the file system is mapped for the logical volumes we created.
I have 2 mapped file systems mapped: “/dev/mapper/RAIDVG-RAID10FS1” and “/dev/mapper/RAIDVG-RAID10FS2”.
Next, edit the /etc/fstab file to add the mapped file system so that they will be mounted on reboot.
Use the command to open /etc/fstab in gedit:
> gedit /etc/fstab
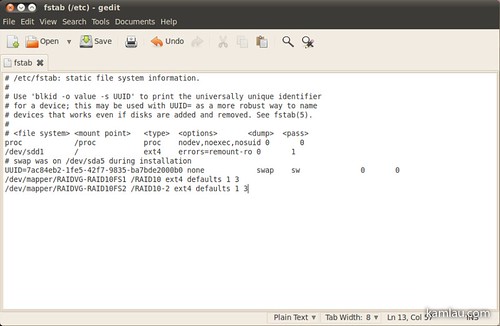
Add the mapped file system to the fstab file like above. Specify the mapped file system, the mount point, the file system type and the options. I added these to my fstab file:
/dev/mapper/RAIDVG-RAID10FS1 /RAID10 ext4 defaults 1 3
and
/dev/mapper/RAIDVG-RAID10FS2 /RAID10-2 ext4 defaults 1 3
Ensure you type in the info correctly. I had a typo and Linux complained about a mounting error on reboot. Once you saved the changes, you can continue to access the RAID volumes via the mount point even after rebooting.
Finished

From Disk Utility, this is how an RAID10 array looks like. For my setup, each array consists of 4 x 1TB drives, resulting in 2TB of effective redundant storage.
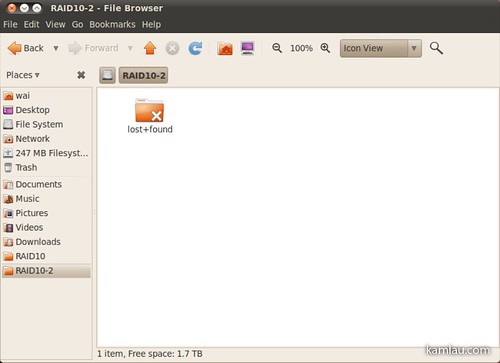
In Nautilus, the RAID array is accessible via the mount point just like a folder from root.
That’s all the steps you need. Hopefully this helps you with your RAID10 setup with Linux. Thanks Kezhong for providing his excellent blog post on how to manage a RAID10 array in Linux to help me kick start mine.
![[KL]-1 kamlau.com](http://kamlau.com/wp-content/uploads/2016/03/KL-1.png)
![[KL]-2](http://kamlau.com/wp-content/uploads/2016/03/KL-2.png)


Howdy .. thinking of doing the same things with my new H341 (just ordered the debug board from VOV Tech) .. Just wondering, all the pretty blinky lights work in Ubuntu? More of a Fedora guy myself, did you get it to work there too? Great site, by the way!
Cheers
Sorry, to be clear, the lights on the Acer case, do they all function properly for you? Did you have to install any drivers from anywhere (in particular the discussion from mediasmartserver.net:
http://www.mediasmartserver.net/forums/viewtopic.php?f=23&t=7720
)
hi vk, sorry I didn’t go as far as enabling the lights for the hard drives. Did you get it to work?
Hi Kam. Haven’t tried it yet, board hasn’t arrived from Texas. Have to admit that I haven’t fully looked into the link to the forum that I posted earlier, I’ll let you know when I get there. I guess I’m just wondering if the lights on your easystore are actually doing anything, or are they just always on/off/blinking/etc.
Hi vk, the set of HD 4 lights on the right side of the case are always off, and the info “i” light is blinking. I don’t mind that as my server is hiding inside a closet :)
What are you using / how did you setup your h340 in order to use a remote desktop? Are you using vnc or something?
I have everything running well except for the remote desktop for the box.
Hi Robin, I use the built-in Ubuntu Remote Desktop software (not the Microsoft Remote Desktop). It uses VNC protocol. I can use the Screen Sharing app in OSX to connect to it. It works well except I have to first physically logged in to the Ubuntu desktop before Remote Desktop works. I have not looked into an alternative yet. HTH.
Hi Kam,
Thanks for responding. I am trying to install ubuntu onto this machine, and I am wondering if you added a GUI to your install. I have some other questions for you as well. I can ask them here, or we can email them.
I am basically looking for information on the setup / install you did for ubuntu. This is the stage that I am at right now.
Thanks in advance!
Hi Robin, I will try to answer your questions if you post them here. I was able to install Linux mainly because I have a VGA output cable connected to the Acer h340 motherboard. Without a monitor connected, I would not be able to install Ubuntu on it.
Thanks Kam.
I do not have the VGA cable, although I would really like one right about now.
I have installed the OS on a spare drive, by placing it into another PC, and installing from the LIVE CD there. I tried with 10.10 at first, but found it a little flakey.
How did you get the remote desktop function to work? I was having some problems with that aspect of the install. Since the machine is headless, I was not able to use a client (VNC) on my windows 7 machine to connect.
Can you please tell me how you setup the login / remote and what client you are using?
Hi Robin, Remote Desktop does not work until you have logged in to the Ubuntu desktop. But you should be able to configure Ubuntu to auto log in when it starts. Try configure that under System > Administration > Login Screen. Once Ubuntu is booted into the desktop, and remote desktop is configure, you should be able to connect to it remotely. Here is a link of how to set up Remote Desktop in Ubuntu: http://bit.ly/glxPg0
Thanks Kam,
I had that issue, and I was attempting to connect via SSH as well. I will try again now that I am using 10.04 instead of 10.10.
Were there any other packages that you installed?
Kam,
I have everything working now, except I am unable to VNC into the machine. I setup the remote desktop like mentioned, but I am still not able to connect. I can SSH in just fine, any thoughts?
Sorry for all the updates. Ok I used nomachine and I can connect to the h340 now. Yay full install no monitor, or VGA cable!
now when I am trying to format the drives, I am getting permission denied errors. Any thoughts?
Are you using a terminal cli to format the drive? If you are, you probably will need to use su command to elevate your rights to super user. You can also use System > Administration > Disk Utility and it should prompt your for your super user credential when there is a permission issue of what you are trying to do. HTH.
Kam,
I was using the Disk Utility, and I added my account to the admin group, so I am not prompted.
These drives were in the old WHS disk utility, so I will try to remove them as well.
I also grabbed a live cd of gparted, so I will also try to reformat the disks from there as well.
I have not had any issues using Disk Utility formatting and partitioning disks. Did you try to delete the partition before formatting?
Yes, it wouldnt let me do anything with the disks, as I was “Not Authorized”
I am hoping that gparted will solve the issue.
Hi Kam,
This worked like a charm. Just wanted to let you know my findings. I used 4 X 3 TB drives, and it took substantially longer to make the array. About 18 hours. Not sure if I did something wrong there.
Also now that I have the raid created, do I need to partition it to start using it? If I use nautilus to view the raid and start making directories, those options are greyed out.
Thanks again for all your help.
Hi Kam,
Looks like I spoke too soon. I rebooted the machine and I got a similar error. I am having a problem bringing the RAID back up. Here is a copy of the fstab I have:
# /etc/fstab: static file system information.
#
# Use ‘blkid -o value -s UUID’ to print the universally unique identifier
# for a device; this may be used with UUID= as a more robust way to name
# devices that works even if disks are added and removed. See fstab(5).
#
#
proc /proc proc nodev,noexec,nosuid 0 0
# / was on /dev/sda1 during installation
UUID=845ae79a-c67c-477e-a3bd-0f1a0607c6f6 / ext4 errors=remount-ro 0 1
# swap was on /dev/sda5 during installation
UUID=85f263de-8f81-4c84-8784-c97d6b55a3fd none swap sw 0 0
/dev/mapper/RAIDVG-RAID10FS2 /RAID10-2 ext4 defaults 1 3
any suggestions? I noticed that yours is a little different then mine.
Kam,
Last point, I did more troubleshooting, and found that all I need to do it type sudo mount -a after a reboot.
any thoughts?
Hi Robin, the fstab file needs to have the exact path from the df -Th command. Do you have “/dev/mapper/RAIDVG-RAID10FS2 /RAID10-2” from the df command?
I will check this once I get home.
I might have something to do with my second raid not being detected from my external esata box.
it might also be driver related for the card I am using. how does your sata adapter show inside ubuntu? I am trying to find out the best way to update the drivers for it just in case.
I am using this card for my port multiplier:
STARTECH.COM
2 PORT SATA 6 GBPS PCI EXPRESS PEXESAT32
Robin
Good guide and much better layout than the original. However and it’s worth pointing this out as it’s rather important:
You can NOT grow a RAID10 array.
Which is a bit annoying really.
On the other hand I think you can LVM two RAID10’s together which isn’t an optimal solution but.
Yes Sarah, you are right. It is impossible to expand a RAID 10 array. I figured if I need more room, I can backup one of the arrays to a big capacity drive (2TB for example) and create a new RAID 10 array with bigger capacity drives. Of course if the 1TB drives become faulty, that would be a natural opportunity to upgrade the storage :)
Kam,
I just wanted to say a HUGE thank you! this guide got me through my entire install.
As a side note, do you have a copy that you could let me download or the server recovery disk that ships with the unit? I was going through my package and realized I am missing that disk.
Thanks again!
Robin
Hi Robin, thanks and I think you got through the install pretty much by yourself as your hardware is slightly different. Congratulations and hope you had fun. I will email you directly about the disc. Cheers.
Sorry, posted that having beaten my head against mdadm in a virtual machine for a few hours.
Rather annoying that a bug that’s been outstanding since 2007 is still alive and kicking :S
echo 9000000 > /proc/sys/dev/raid/speed_limit_min
A handy command others might want to use. It should up the minimum speed mdadm is using to build/rebuild an array from 1MB/s to a theoretical erm.. 90MB/s possibly 900MB/s.
It can’t achieve this obviously but it’s a handy cudgle to beat it with to speed up the rebuild on a system that isn’t busy. Not hitting the minimum doesn’t seem to cause it to freak out in anyway.
I took a while for my 4 x 1TB setup. I had to leave it running overnight.
Moving array’s can also be a headache. Yes, it will resync the array (which will take the same length of time it took to build).
However Ubuntu 10.04 has some gotcha’s if you get ahead of yourself. For example I moved a 2 disk RAID10 and preinstalled mdadm on the new machine.
This was the first mistake, it found one of the disks and locked it but lsof reported nothing, meaning the array couldn’t be rebuilt. apt-get remove mdadm, reboot, apt-get install mdadm, followed by the command to create the array again and accepting the warning about disks being part of an array solved that problem (after 4 hours of disk griding).
Next lvm2 had a massive fit because it didn’t want to see /dev/md0 or /dev/md0p0 despite being filtered to allow all block devices I know nothing about regexp but the Gentoo wiki suggested this “filter=[“a|dev/md0|”, “r/.*/”]” I’m sure md? might work as well and it stopped insisting that /dev/sdc1 was my whole lvm and that all the others were clones.
After THAT it mounted just fine. Of course finding out all of that was a massive trawl through google and 5 – 6 hours of hair pulling & trail and error.
So there you go, one possible way to avoid this happening to you: Don’t pre-install mdadm on the new machine.
Thanks for sharing the info. I have never tried to relocate an array. I imagine one day I will have to… Do you have a step-by-step write up of what you did? Would love to read the whole process you went through.
it is unbelievable, but “sudo mdadm –detail /dev/md2” during array creation made the whole Ubuntu Terminal application totally frozen. All the tabs!
Thanks for doing this, went through it step by step and it worked perfectly!!
I now have a nice and fast RAID 10 setup!