Upgrading WD My Book Studio II
Ever since I got the WD My Book Studio II, I keep all my photos in it as it is a RAID device. A 2TB device provides 1TB of storage when it is in RAID 1 mode (mirrored) and I quickly approach running out of room with RAW files being part of what I keep. Luckily I have a couple slightly bigger capacity compatible drives to let me upgrade the external unit with.

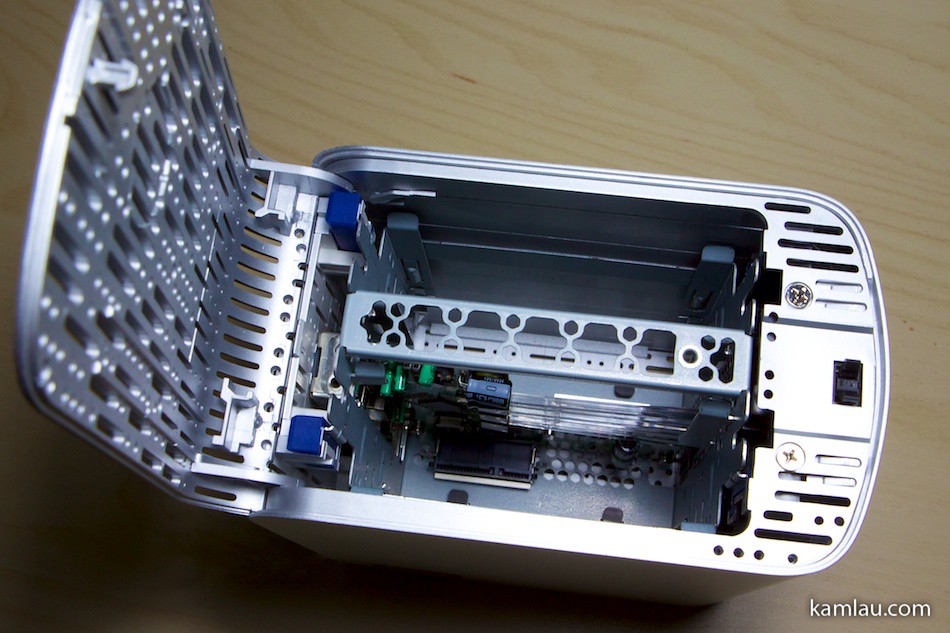
After opening the case from the top and unscrewing the top retaining plate the original 1TB drives can be pulled out. They are very snug so it took a little bit of force to extract them from the case, like pulling teeth :P

Here is what the case look like without the drives. It is pretty minimalistic. One logic board right in the middle in between the drives. SATA connections at the bottom. There are rubber feet to cushion the drives as well.

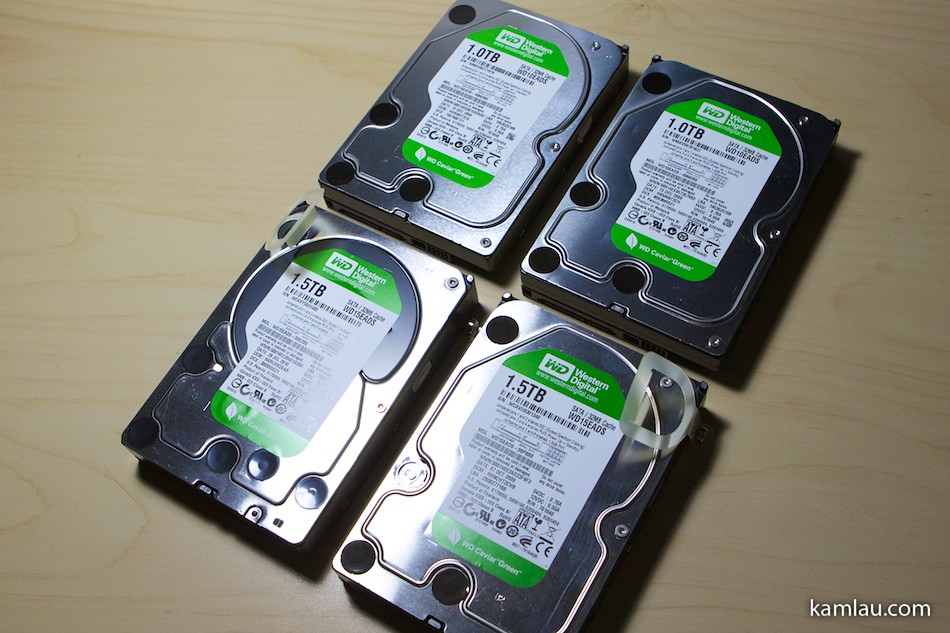
The original 1TB drives are at the top, I am replacing them with the 1.5TB drives. They have to be the Caviar Green drives, probably for power consumption and heat dissipation reasons.

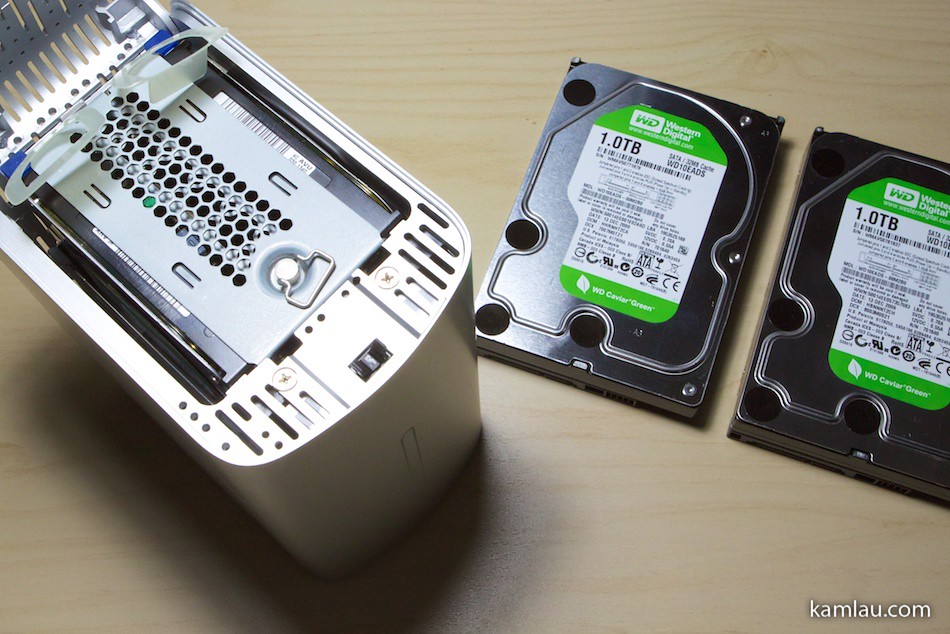
Here they are all assembled. I am going to put the spare 1TB drives into my Linux server as another RAID 10 set :) More on that here.

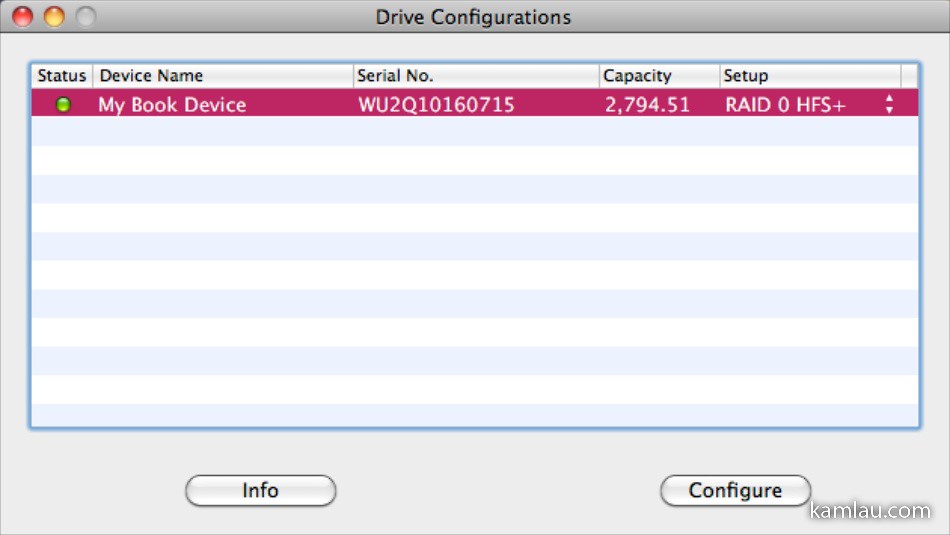
After connecting the drive back to my iMac, the WD Drive Manager automatically recognizes the new drive configuration and sets it up automatically with maximum capacity mode (RAID 0). Just be forewarned that all the data in the drives would be wiped clean!

I changed it to RAID 1 (mirrored) mode and now I have half the capacity, but total data redundancy. After copying all the photos back on it, I still have 50% space left, so I should be good for another year or so :)
How do you keep your data safe? What do you do to prevent data loss from hardware failure?
![[KL]-1 kamlau.com](http://kamlau.com/wp-content/uploads/2016/03/KL-1.png)
![[KL]-2](http://kamlau.com/wp-content/uploads/2016/03/KL-2.png)


Well, I thought the Caviar Green is not as “green” as it advertised… it runs slower and hotter than its black and blue brothers.
WD advertises that the Green’s R/W takes 6.00Watt and the Black’s R/W takes 8.40 Watt. And according to techreport.com the power consumption is one of the lowest in the comparison. AnanaTech also reported that the Caviar Green runs cooler than other drives. But I have no idea how it compares with the Blue and Black brothers….
this is interesting.
i was thinking of upgrading my 2tb studio ii with 2x 2tb or 2x 3tb caviar green drives, and the wd support told me that the enclosure firmware on both the 2tb and 4tb studio ii doesn’t support drives with bigger capacity than the ones included and they were sorry about it.
another case of companies lying to customers to make them buy new products instead of upgrading existing ones?
hi straycat, I am curious to see if you can upgrade to 2x2TB or 2x3TB. Let me know if you succeeded in doing so. :)
I was able to upgrade my 2TB Studio II enclosure to 4TB (2x2TB) successfully. It was as easy as replacing the drives and then running the firmware update .dmg available on the WD website with the enclosure connected to my Mac.
Prior to running the firmware update, it only reported the previous 2 TB capacity despite having 4TB installed and configured for RAID 0. I’d imagine they’re detecting the capacity of the drives in the enclosure when the firmware is installed and configuring the enclosure to match.
They haven’t released an updated firmware version on their site since the 2x3TB version of the enclosure was released, so I’d probably avoid making the jump to 6TB for now. It’s likely the currently available firmware doesn’t support that configuration.
Jon, thanks for sharing your upgrade experience. Which version of the firmware did you install?
I installed the 1.015 firmware available at http://support.wdc.com/product/download.asp?groupid=114&sid=103&lang=en
Thanks John! Just wanted to do just that!
Did you use the WD Caviar Green SATA Hard Drive 2 TB or 2 others? Thanks man!
Hey, I just replaced my 2 1TB drives with 2TB drives, one after another to get the old data on the new drives. Unfortunately it remains at 1TB capacity?! Updated firmware using the automatic tool (mac) to 1.0.17, still 1TB (RAID1). Any ideas?
Alex, my guess is when you inserted your first 2TB drive in the enclosure, it is formatted to be the same size as your other drive (1TB) and when you insert your second 2TB drive it is then formatted the same way as your first 2TB drive. So what you really have to do is to install two new unformatted drives in there so that the enclosure formats them together with the new size, and then copy your files back to it.
Try to use a different enclosure with your old 1TB drive and see if you can read the data. If it can be read, then you should be safe to try this. Good luck.
I wasn’t patient enough to wait for my new hdd enclosure to copy back the data…after trying around I reinitialized the RAID1 drive, after that I got the full 2 TB capacity, but of course my old backups are gone…
btw, the old drives can be read in another enclosure, just tried it using my new fw800 enclosure (just arrived)!
thx for your help!
Hey Kam, I was wondering if you were to remove one of the drives and put it into an external dock, would the mac read it and treat it like a normal drive?
The reason why im asking is that once the drives are full, instead of filing away both drives, can you remove one and store that away and replace it with new drive and erase the whole unit to start fresh?
Hi Oliver, sorry I have never tried that with my WD drive. I transferred my files to a spare hard drive before changing the drives in the WD My Studio II setup. That way I am sure I have a good copy before messing around with my data.
Hi guys!
Can i use Seagate and other brands. because I can’t find WD Green ? :(
Nope, use WD HDD only, and GREEN, to be on safe side.
Hi Kam,
I got WD My Studio II 1TB (500+500GB) – old one. I am wondering, if I can upgrade drives inside to 8TB (4+4TB). Any idea on this ? I would bou WD Caviar Green…
it works like charm with 2x4TB drives! So I did upgrade from 1TB to 8TB!
Hey Brano – are these SATA III or SATA II drives? did you use “WESTERN DIGITAL Caviar Green WD40EZRX, 4.0TB, Bulk” how exactly did you go about upgrading?
Hi Matt, exact name is “WD Caviar Green 4TB 64MB Cache S-ATA 6.0Gb/s Hard Disk Drive Model “WD40EZRX” OEM. More here: http://community.wd.com/t5/External-Drives-for-Mac/1TB-My-Book-Studio-II-upgrade-to-8TB/td-p/630573
Awesome! Were you able to upgrade it by swapping one drive at a time and letting it rebuild? OR did you have to format from scratch and copy files manually to get the full 4tb on each drive (mirrored is what I’m assuming of course :) ).
Does anyone know if the SATA III caviar green drives will work with the Studio II (I have a 2TB version and would like to upgrade to 6TB)? The SATA III drives are cheaper than their SATA II counterparts
SATA III should be fully compatible with SATA II, so I would stick with SATA III.
Thanks Brano! I liked you phrase: “So thanks for help.” at http://community.wd.com :-)
2 times WD40EZRX for me now! cheers
yes, that was meant as irony, how “good” WD support is. “Not supported”, one should thought it will not work. Well, they want to sell new devices…but, I am little bit in doubt, if I really shouldn’t upgrade for some thunderbolt, or USB3. Do you know about some case, where I just insert HDDs and it supports TB/USB3 ? Drobo maybe ?
Not yet, but started reading/searching
http://scottkelby.com/2012/im-done-with-drobo/
http://www.waitingoutside.com/2012/04/an-alternative-to-drobo-the-mediasonic-hfr2-su3s2-proraid-usb-3/
But until then, I don’t wanna buy. I’m happy with USB2! (Mainly Photos)
thanks for sharing. I will stay with my FW800 for now, for video editing it is great, and later on, if needed I will upgrade to something new :)
WD40EZRX perfect! it works.
upgrade to 4TB 2TB without problems or complications.
WD40EZRX perfect! it works.
upgrade 2TB to 4TB without problems or complications.
WD red work too